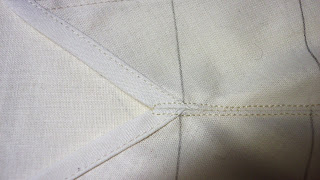
I enlarged a pattern from Corsets and Crinolines page 46.
Having cut it out of a plain off white cotton I traced the horizontal lines for the boning casings and then bound the curved top edge. Next I stitched up and top stitched the side seams, and did a narrow 1/8th inch hem.
Having run out of my beige bias edging I had to tea dye some white 2” cotton I have on a roll. It turned out a bit more pink than I had hoped but I am pleased enough with the outcome. Having dried, I turned it in using a ½ inch bias tape maker. Note that I left it at 2’ wide so it was halved and then halved again when pressed into bias tape, which made it significatly more stable.
I began from the top, leaving the second row open to allow the arched bones to be inserted and then stitched down so as not to buckle at center front.
Being on a non-existent budget I resorted to finding an alternate type of boning. When a shipping company receives a palette of anything, it comes wrapped with a plastic “tie strapping” that’s free for the taking if you ask for it. I’ve used one type before but this time I was able to get my hands on a black type. It was ¾” wide, which I thought might cause a bit of a problem, but I soon found out that my rotary cutter works fantastically to split it to whatever width I needed. Then I simply cut it to the length I needed and melted the edges with a candle to round off the points. Below the shortened split and melted pieces used in the panniers.
After inserting the boning pieces with an 1½ ” overlap to prevent buckling I stitched closed the gap that had been left and then used a heavy weight cotton cording to stitch through in 8 places around the boning to pull in the panniers to create the oval shape. I simply pinned the top slashes closed when placed over the waist to secure.


No comments:
Post a Comment